My kids have too much stuff. I think this is something most parents feel and say all the time. Originally we had our kids toys, books, stuffed animals in our upstairs TV room. I hated it! When we moved the girls into the same bedroom this opened up our back bedroom for their toys. I moved everything down to this room but never gave it a face lift or even organized anything. The embarrassing truth is, most days it ended up looking like this...
I seriously cleaned this room all the time. My issue with this room is that because I am usually on the other side of the house the girls rarely played in it for long periods of time. We have an office/guest room that was closer to the kitchen so I decided to pull a little switcheroo.
We haven't done anything with the guest room (or as I called it, the room of requirement) since we painted it. It was basically a storage room with a bed. I wanted to move the playroom here because it is the closest room to the kitchen and the back room has a closet (better for the guest room). Here is a look back where we started:
After a fresh coat of paint and a trim makeover. The color looks a little beige but its really a light grey.
Now a new and improved playroom!
Almost all the furniture in here is hand me down. I painted the bookshelves white so they would match. I tried to really give everything a place so cleaning up will be a little easier. It is a little cluttered but I sort of like that for a playroom. I feel like it gives the girls access to everything and its also very colorful. I made that chalkboard for the space. I love art that can change based on our moods.
I think my favorite part of the room is the clipboards I made for the girl's art (details below). They turned about better than I envisioned and Amelia LOVES seeing her art up there.
I plan on making a frame for the map that will match the wood on the clipboards. Also how cute is that little tea party in progress. That little door is a storage area. I put paint and craft supplies in there so I can access them easily but the girls can't ;)
This room doesn't have a closet so I hung up an Ikea rod and made a little dress up area with accessories in the trunk below.
I put a some personal touches above the dress up area as well. A picture of our wedding day with us all dressed up and the girls in their Easter dresses last year. I think I would like to get a great picture of the girls in dress up clothes and put that here as well.
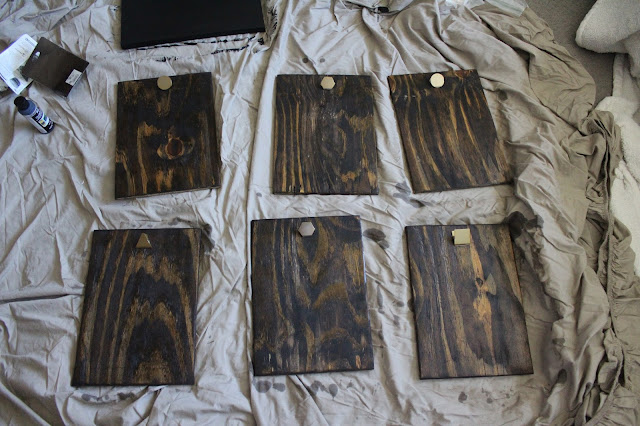
The clipboards were so easy and inexpensive. I decided on 11x14 because most pages will be 8x10 or 8x11 so it will naturally frame the artwork. We actually had 12 pieces of already cut plywood (the perfect size no less) in the garage. No kidding. My dad was helping Brian with a project and cut a few extra pieces. Easy peasy.
I am all about using what I have so I stained them with a Dark Walnut Miniwax stain. I lucked out and found these brass paper clips in the clearance section at target.
A dab of super glue and tada! clipboards. I love that the clips are all different shapes too, perfect for a playroom
I added small picture hangers to the back (which was the hardest part) and now we have the perfect spot for all the preschool artwork!
I ended up with 8 because it suited the space.
I have been working my buns off these last two weeks. I finished the playroom (clearly) but I also painted the guest room, added hardware to my kitchen cabinets (FINALLY), and am working on an address planter box for the front of the house. Hopefully I can get those projects wrapped up and post that here soon. I am a busy girl when Brian goes out of town! I curse myself everyday because of pure exhaustion but then I am so happy that the projects are done.
Happy Thursday!


