Wednesday, March 27, 2013

Farmhouse Table Part II

Okay we are on phase 2 of 3 for the farmhouse table. This is actually a pretty boring update and mostly just about the pictures. I used wood putty to fill in any nail/screw holes, conditioned it with Miniwax conditioner, and stained it using Wainscot Walnut from Sherwin Williams. We already had the stain from a previous project so that saves a little money. 

We could play a little game with these photos. How many pictures can you find Goose in?


Rustic, right??? I love the way it turned out. It is reading a little red in the pictures but it is more of a greyish brown. It still needs a sand and a coat of poly. I can already picture the dinner parties this table will bring :)

Monday, March 25, 2013

Farmhouse Table Part I

Our first big project is soooo close to being done. Our dining room table has been on our to do list for years. We knew that our first big project would be building our own table. I love the farmhouse style because we (mostly just me) are beginners so the design is forgiving. I had the idea in my head and I found a great design at Ana White. Her blog is AMAZING! She has a design for everything and breaks it down even to the cut list. Really great!

Brian did not follow her actual plans but we did stick with her design. We customized the table to fit the room and the amount of chairs (8) that we wanted to fit around it. We stuck with pine because it is affordable and looks great with a nice stain on it. 

Brian started with the table top. He used a joiner with glue to join all the planks together. We have 4 2x12 capped with 2 2x12 on the end. The table top is around 7" long and 4" wide (huge and HEAVY). He framed it out for support with 2x4 boards underneath.  


After the top was done he did the legs and frame. We wanted 4x4 legs but could not find them anywhere. Most of the local mills have gone out of business and the only one that carried them they were in cedar and really pricey. We decided to use 2 2x4 pieces. I am loving how it is turning out. 


yep, that is a Goose hiney...

I have now sanded it, conditioned it, and stained it. I am waiting for the stain to dry and I will finish it up with another sand and a poly finish. I can't wait to see/show the finished product. Now I need to figure out the chairs...and how to get it from the garage into the house...We'll worry about those tiny details later.


p.s. I didn't go into much detail because I am not very wordy but if you have any questions about details feel free to ask :) 

Sunday, March 24, 2013

Painting Our Stair Railing

When we moved in one of the first things on my list was the trim. I am not a big fan of dark trim in small spaces. After we tackled the trim and fireplace we moved onto the stair railing in the hallway. When you walk in the front door it's the first thing you see and I felt that it made the house look dated. 

We used the same approach for the railing as we did for the rest of the trim. We gave it a really light sand and started with a primer. Brian did the primer while I was out of town so the smell wouldn't be too strong with a baby in the house. I finished it off with 3 (yes 3!) coats of Olympic Premium No VOC white (semi-gloss). Painting a railing is NOT fun. Very tedious and meticulous work. Worth it. You can see the before and after below. 

Before...hello 1986


*after*

(yes that is a pile of laundry 
at the top of the 
stairs, whatevs)

I still need to paint the walls leading up the stairs, but this is a clear improvement. I love how these little changes can make a huge difference. I really need to get some art/decor up on those walls. One thing at a time I guess. 


Friday, March 22, 2013

Mason Jar 101

I'm in love I'm in love and I don't care who knows it.....(name that movie and we are for sure best friends)

I love how my most recent project turned out AND it was so easy! Brian and I wanted a pendant/hanging light above the sink and since our kitchen has a country vibe we decided to try the mason jar route. I have seen ideas floating around Pinterest and took a stab at it. 


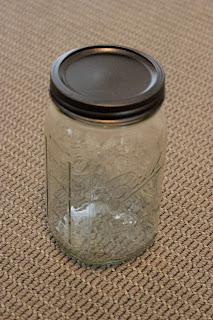
In this picture I have a regular mouth
jar but I ended up using a wide mouth. The 
regular mouth jar was too small for
the kit and light bulb. 

I picked up the supplies at home depot and ace hardware. We wanted oil rubbed bronze so I  picked up spray paint to match the light kit (the kit came in bronze or nickle). I grabbed a vintage looking light bulb since the bulb will be exposed through the jar. 

I started by spraying the lid of the jar. I wanted to make sure that it matched, but also if it got a little rubbed off in the assembling I figured it would add a little character. 


I measured the hole by tracing the kit on the lid. This was easy since I had already sprayed it I just etched the paint off a little. Once I had the guide I used a hammer and nails to put holes in the circle. I also added extra holes punched around the lid so the head will have a place to escape. This is a REALLY important step because if there isn't anywhere for the heat to go it could cause a problem with the jar breaking open. I used scissors to make the actual hole. 


Next I just needed to add the light kit and light bulb to the opening. YAY! Mason jar light just like that. 


Like I said this is going to be hanging above our sink. We still have to run the wires through to the ceiling so it will hang nicely. But we wanted to see it lit up so we plugged her in. 


Isn't she a beaut! I love it, and it looks so cute in the kitchen. It was easy too! If I can do it ANYONE can...no joke. Once we figure out the wiring I'll bring you a picture of her in all her glory. (Turns out I give inanimate object genders, owning it :)

p.s. Last but not least, some exciting news. I entered a blog giveaway a while ago over at Yellow Brick Home and I WON! They have a great print shop here. I was able to choose 3 8X10s from their large selection of prints. Here they are!


They look so great in person. Really good quality! I can't wait to pick up some frames and get them up on the wall. We choose the lupins because those grow wild in NorCal, the middle print is the California coast, and the print on the right is of Amelia island. How perfect is a print of Amelia Island for us.


Wednesday, March 20, 2013

Two Room Update

Alright, our first update. Now I want you to keep in mind that progress has been slooooooow. However, since there has been some progress I thought I would show a couple of rooms that have the most progress so far. Get ready for a long post. 

Lets start with the living room.

Here are the before pictures. The room is hard to get a good picture of because of the size. Basically it had dark trim and a yellow/beige color on the walls. It also has a door to the outside from the living room.

We started with painting the fireplace. We love the difference.
The fireplace was such a light sucker that it immediately brightened up the room.

After we got all the trim painted (white semi-gloss) we picked a color for the walls. I love everything grey especially against white trim so we picked a light-medium grey. The color is called Repose Grey by Sherwin Williams. We also ended up moving the couch back against the wall which covers the door. We NEVER use the door so we would rather have the space. Eventually I will either put up a whole wall of curtains to cover the door or we will just remove the door entirely. It was the only way we got our couch in the room though so it will probably have to stay for a while. Anyone looking for a sectional??

Please ignore the TV. We don't
even have cable, it is just
down here to watch
movies on the PS3. It is NOT staying.
 Well, I could say that about
most of the room.

Also ignore the crazy light show we have going
on in our living room. 
Hopefully those will be replaced soon. 
You don't have to ignore the photo bombing dog though :)

We have also added a couple of decorations and storage. On the fireplace mantle is a painting to add a little color to the room. My favorite new decoration is our little horse head nicknamed Stony (Stone+Pony). Once we finally get some furniture and shelves up he will start to look even better. 


When we had Amelia we knew that there would be an increase in baby stuff around the house. Clutter gives me anxiety so we have been looking for easy ways to keep everything organized. Luckily we don't have a lot of stuff because Amelia doesn't seem interested. When you have an 80 pound furry buddy to play with who cares about toys, right? 

Kermit is being quite
dramatic in there...

Diaper storage.

Then next room that has seen some progress is the kitchen. We have probably done the most work on the kitchen so far. You have already seen one post about our knife strip which also showed some of the progress. Here is our before picture (that you have now seen 10 times...)


And our progress picture...


It is already so much better. We painted the kitchen with Heart of Palm by Sherwin Williams. We use Sherwin Williams because there is one right down the street, they send a lot of coupons, AND they carry an Eco friendly No VOC line called Harmony. It usually takes 2 coats but really has no smell. With a baby and a dog we felt that was really important. 

Along with painting we also took the back splash off and painted the wall to match. I think that made a huge difference. We also  did the chalkboard wall, removed the cabinet above the sink, removed the doors to another cabinet and hung up some shelves. We are CLEARlY no where near finished with this room but we have made a lot of progress. Where the open cabinet is we actually plan on replacing that with shelves to open up the kitchen even more. In the meantime this will do.  

I did have to paint the inside
of those cabinets with
at least 3 coast of semi-gloss. Not
fun.

We need to finish the trim above the cabinets and install our light fixture above the sink (just finished making it today :). We also plan on replacing the counters and floors, hopefully in the next year. 

If you look on the top shelf in our open cabinet you can see my finished (for now) pitcher collection. I love how it's coming along. I plan for it to end up in the dining room but that happens to be our catch all room right now. 


We did add some open shelving on the other side of the kitchen. Just a couple of floating shelves. I love having the extra space for storage. I love anything that helps keep stuff off the counters. I also can grab it easily when I'm cooking and I think food makes for good decorations in the kitchen. 


That is all the room updates I have for now...I can't wait to show you the light fixture we made. :)


Happy Spring!


Monday, March 18, 2013

Knife To Meet You

We have zero counter space in our kitchen. I think this is due to the fact that we have no island or even a peninsula. It is a nice open kitchen with not very much storage space. No counter space= a cluttered counter which then drives me crazy. I have been looking for ways to de-junk the counters and I have found one solution. A knife strip! Before we had this big knife block that took up the entire corner AND it had to be pulled out every time because of the cabinet height...yikes. 

Since this picture was taken we have painted,changed the 
back splash, changed some cabinets, 
and moved our spice rack off the counter. More on 
those changes later. 

After hearing me complain about the knife block 400 times Brian was more than happy with the idea of a knife strip and excited to hang it up for me. I bought the knife strip here after reading plenty of reviews. Since we have a dog running around and a mobile baby soon enough we didn't want to run the risk of ANYTHING falling off. I also use the knives a lot so it definitely needed to be durable. 

Well here she is in all her glory...


What a space saver! I also love the convenience of it. Now onto the task of getting all those dishwasher stains off the knives. Any ideas???

Friday, March 15, 2013

March Madness

We have been working our little tails off lately on projects. I wanted to write everything down so we could be held accountable for getting these projects done. We have completed probably 20% of all the projects we want to accomplish this month. Here it goes:

1. clean and paint plastic planters for front porch
-When we moved into the house I noticed our previous owner left behind some old plastic planters. They have been sitting outside collecting dirt and pine needles. I want to hit them with the hose, a nice coat of paint, and after picking out a plant put them on each side of the front door.

2. mason jar pendant light
-Our light fixtures in the house (the WHOlE house) leave a lot to be desired. The kitchen is the room I spend the most time in so we are tackling those first. I have decided I want to try a mason jar light fixture. We knew we wanted a pendant light above the sink and since we have a little country rustic decor I think it will look great. After 4 stores today I finally got all the supplies for the fixture for around $15. No excuse not to get this done soon!

3. paint/finish my pitcher collection
-Three months ago I saw a ceramic pitcher while perusing thrift stores and had a light bulb idea. How great would it look to have  ceramic pitchers on shelves in the dining room? I didn't want all different colors and patterns so I picked up some paint and started thrifting. I have found 7 pitchers for all under $3 and picked glossy white for the paint. The project is very close to being done and it looks great! Well when I say done that just means with the pitchers I already have...

4. finish trim in kitchen
-We recently took down some cabinets in our kitchen and have not yet fixed the trim. No biggie and not very exciting, just on this list. 

5. finish painting Amelia's inherited crib
-We inherited a really great crib for Amelia. The crib is actually the crib that I slept in as well as all my siblings. Its a great Jenny Lind crib circa 1982. I love it but I didn't love the Oak finish so I have decided to paint it white. In the meantime Amelia is sleeping in the pack n play so this needs to get done. Luckily Amelia doesn't seem to notice.

So there is the list. There are other things on the list but I'm not sure they will actually get done this month so I don't want to put to much pressure on.  We do hope to finish the dining room table, find chairs (thrifted), and finish the paint in the guest bathroom. Since we don't watch college basketball we are having our own version of March Madness over here. Wish us luck :)

Thursday, March 14, 2013

Cleaning An Electric Stovetop

When we moved into our new house we inherited some wonderfully ugly off white appliances. Hopefully we can replace them soon but until we can save up some money we are going to make do.  They add so much glamour to the kitchen don't they?


Not only do they have that great off white color but the stove top was a mess. It was covered in scorch marks around each burner. While it didn't affect the cooking it made the kitchen look messy.  I tried regular cleaner, vinegar mixtures, lemon and nothing was working. I even soaked it for a couple of hours with different mixtures, like a regular 4th grade science experiment, still no luck. This is when I realized that the gunk was not just going to wipe up, it must have been like this for years. I busted out some baking soda paste (baking soda and water) and covered each burner and let it sit for just about 5 minutes. I grabbed a paint scraper (a clean one) and started scraping off that paste. Well would you look at that....(name that movie)

The baking soda paste and paint scraper made the perfect team. You have to add in some elbow grease if the stuff is really on there. It worked best if the baking soda mixture was still a little wet and I had to reapply when the mixture would get too dirty. But it worked!

When I finished the first two I was amazing at how BAD it looked before. The project took me around 1.5 hours from start to finish. Longer than I would have hoped but I really think it was years of gunk. The end result was well worth it.

Looks great! The bottom right burner was so scorched there is still a tiny ring but it really is night and day.  Now when I cook I have been keeping a wet towel next to me and if a pot boils over (every meal) I just quickly wipe it up. 

One little disclaimer: I am pretty accident prone but I ended up with a couple cuts on my fingers from the scraper. I would recommend wearing gloves if you are going to do it this way. Next time I have to scrape my stove (hopefully never) I am busting out my gloves for sure.