I'm in love I'm in love and I don't care who knows it.....(name that movie and we are for sure best friends)
I love how my most recent project turned out AND it was so easy! Brian and I wanted a pendant/hanging light above the sink and since our kitchen has a country vibe we decided to try the mason jar route. I have seen ideas floating around Pinterest and took a stab at it.
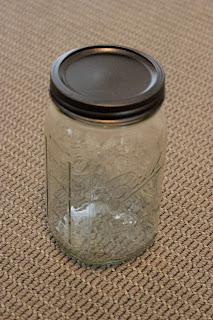
In this picture I have a regular mouth
jar but I ended up using a wide mouth. The
regular mouth jar was too small for
the kit and light bulb.
I picked up the supplies at home depot and ace hardware. We wanted oil rubbed bronze so I picked up spray paint to match the light kit (the kit came in bronze or nickle). I grabbed a vintage looking light bulb since the bulb will be exposed through the jar.
I started by spraying the lid of the jar. I wanted to make sure that it matched, but also if it got a little rubbed off in the assembling I figured it would add a little character.
I measured the hole by tracing the kit on the lid. This was easy since I had already sprayed it I just etched the paint off a little. Once I had the guide I used a hammer and nails to put holes in the circle. I also added extra holes punched around the lid so the head will have a place to escape. This is a REALLY important step because if there isn't anywhere for the heat to go it could cause a problem with the jar breaking open. I used scissors to make the actual hole.
Next I just needed to add the light kit and light bulb to the opening. YAY! Mason jar light just like that.
Like I said this is going to be hanging above our sink. We still have to run the wires through to the ceiling so it will hang nicely. But we wanted to see it lit up so we plugged her in.
Isn't she a beaut! I love it, and it looks so cute in the kitchen. It was easy too! If I can do it ANYONE can...no joke. Once we figure out the wiring I'll bring you a picture of her in all her glory. (Turns out I give inanimate object genders, owning it :)
p.s. Last but not least, some exciting news. I entered a blog giveaway a while ago over at Yellow Brick Home and I WON! They have a great print shop here. I was able to choose 3 8X10s from their large selection of prints. Here they are!
They look so great in person. Really good quality! I can't wait to pick up some frames and get them up on the wall. We choose the lupins because those grow wild in NorCal, the middle print is the California coast, and the print on the right is of Amelia island. How perfect is a print of Amelia Island for us.


No comments:
Post a Comment